How to Propagate Houseplants
November 07, 2022 7 min read

If you're anything like us, you'll get the feels when one of the houseplants that you have raised from its nursery pot into a bushy mature plant and has started to produce baby plantlets of its own.
Congratulations! You're a new houseplant grandparent!
("You don't look nearly old enough! What's your secret?")
The next worry though is how do you encourage this plantlet to grow roots and go off on its own? Or how do you get some of your other houseplants to produce plantlets? Not all houseplants reproduce the same way, and may need some encouragement...
Divide and conquer with our Horty hints on propagation, helping you grow the most out of your foliage friends.
The basics of propagation
What is propagation? Put simply, propagation is the term given to the act of growing new plants from older plants in your current collection.
There are several ways to propagate houseplants, and different types of houseplants prefer different methods of propagation, some of which are simpler than others.
Whether you are growing from natural rooting, taking cuttings or division, our propagation overview will help you decide what is the best method for which plant:
Take cuttings
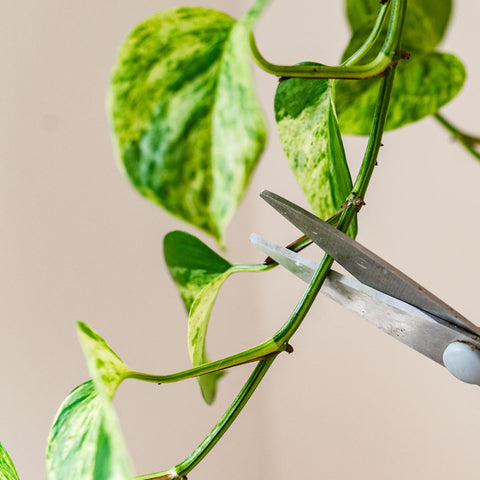
Growing from cuttings is a simple method of growing new plants from the stems and leaves of houseplants that have been cut away.
This method works best with Pothos, Monstera and Philodendron and is handy when you need to give an overgrown houseplant a bit of a trim but don’t want to bin the healthy growth.
Once the cutting has been made it can be placed into a pot of soil or a container of water, and left to grow new roots, which can then be potted on.
Encourage offshoots to root naturally
One of the easiest ways to propagate houseplants is to let the plant produce its own plantlets and transplant them into soil when they are big enough. This method however is specific to certain plants such as Spider plants (pictured), Aloe Vera and the Mother fern, as not all houseplants reproduce this way.
Plantlets that grow on the fronds and stems of the plant will eventually grow roots of their own and can then be planted into the pot with the mother or in new pots of their own.
Divide and conquer
Propagating from division is a simple method of taking the plant out of the soil and splitting it in two.
This approach is more effective with compact, multi-stemmed houseplants such as Boston Ferns, Peace Lilies (pictured) and ZZ plants that grow from large root balls and tubers.
Once the root ball is big enough it can be split and then planted separately. Leave these new plants in a bright indirect location to establish, literally giving you two for the price of one.
Painless propagators
Some houseplants are easier to propagate than others but, with a bit of perseverance and with the right growing conditions, most houseplants can become two, then four, then eight and before you know it... a jungle.
Start you propagation journey with an easy grower, something that will allow you to hone your skills before you try hacking back your favourite Ficus. Below is our list of the easiest houseplants to propagate (in no particular order), along with the best method for the job.
Pothos: Pop stem cuttings in water and look for natural rooting of the root nodes on the stems.
SHOP POTHOS
Sansevieria: Pop leaf cuttings in water or divide the plant(lets).
SHOP SANSEVIERIA
ZZ Plants: Division of the tubers will give you more plants.
SHOP ZZ PLANTS
Chinese Money Plants: Give it time and you'll see plant babies pop up from the soil.
SHOP CHINESE MONEY PLANTS
Tradescantia: Pinch a stem or two and root them in soil or water.
SHOP TRADESCANTIA
String of Hearts: Propagate a "string" or two in soil or water.
SHOP STRING OF HEARTS
Spider plants: Encourage natural rooting of plantlets in water or soil.
SHOP SPIDER PLANTS
Arrowhead plant: Place stem cuttings in water.
SHOP ARROWHEAD PLANTS
Monstera: Pop stem cuttings in water.
SHOP MONSTERA PLANTS
Elephant Ear Plants: Propagate any pups sprouting around the mother plant.
SHOP ELEPHANT EAR PLANTS
The right tools for the job
As with most things in life, having everything you need assembled before you start makes the job at hand far easier and increases your success rate.
Propagation can often be very simple but, with the right tools to hand, you can be faster, more efficient, more successful and have things look far prettier than if you just wing it.
To make your houseplant propagation more efficient and effective we recommend you consider...
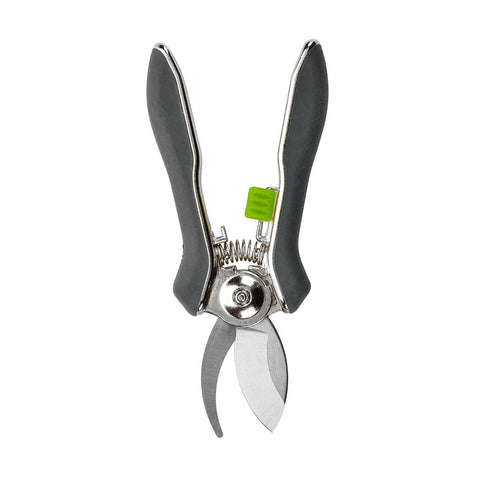
Pruners/Pruning Scissors
Yes some plants can just be pinched into propagation ready lengths but, a decent pair of pruning scissors will make so many plant maintenance jobs so much easier.
If you don't already have a pair make sure you invest in some...
Conveniently we have a couple of options that we can recommend including the great all-rounders pictured and linked below, as well as a couple of great options from "BetterGrow".
Plant Nutrition
When you remove a propagated plant from the mother you significantly reduce its ability to gain nutrients for its self.
If you then put it in water or soil that's devoid of nutrients you can see propagations fail.
A pro-tip is to use a little liquid feed to increase the availability of nutrients in the soil or water you're using to grow plants on in.
Root Stimulator
Strong roots make for a strong plant.
Liquid and powdered root stimulants will help your propagated plants get off to a strong start in life.
We like Root Ultra Plus as it's also great for use when repotting plants.
Always good to have one product you can use in a few different ways!
Potting Mix
When your plantlet has developed roots you'll need to plant it on into its new pot.
A quality potting soil will allow your new plant to put down roots in its new home far more easily and become established quicker too.
Repotting can be a traumatic time but the right soil will reduce stress on the plant (and you!) increasing your prospects of a healthy plant.
Pot Liners
Jam jars, old plastic bottles, yoghurt pots... sure; you can propagate plants in water in just about anything... so why not make it a joy to look at?
With a plant pot liner you can create a watery propagation station within a beautiful plant pot.
Make your propagation area look fabulous (not like you've forgotten to take the recycling out) with the help of a stunning indoor plant pot and a waterproof plant pot liner.
The propagation process
OK, so you've got your plants and got your tools... What now?...
Select the cutting: Before you take cuttings from your houseplants, you need to make sure you choose the healthiest plants to start growing from. Dried or yellow growth, plants with pests or pest damage and stems with lots of flower buds will struggle to grow new roots. Look for healthy leaf nodes, (the bumps on the stem below the leaf) and lots of lush green growth, so that the mother plant won't suffer if you accidently cut too heavily.
Make the cutting: Before you make the cutting make sure you use clean, disinfected sharp pruners to prevent diseases spreading from plant to plant. When you make the cutting, you have to cut below the leaf node on the stem that you are cutting away. If you are taking cuttings from a trailing plant like a Pothos, there may be several leaves and nodes on the branch that you have cut away. This can be made into several cuttings. Each cutting needs a minimum of two leaves and two nodes securely attached to the stem, so that it can grow once it has developed new roots.
Water or compost: Cuttings can be grown in both water and soil, and some plants have a preference with which method you use, however, growing cuttings in water often has a better success rate for beginners. The water method helps you to see what would have been going on below the soil level and when the cutting will be ready to pot on.
Rooting in water: To root your cuttings in water, simply make sure that the nodes on the stem are submerged below the water level. If there are any leaves close to the nodes on the stem, cut these away, as they will rot when they get submerged. Each cutting should have no more than two leaves and a minimum of two nodes. The more nodes the more roots.
Locate and wait: place the cuttings somewhere bright, warm and humid, like a shelf in the bathroom. Avoid placing the jar in direct light and away from heart sources such as radiators, as this will kill the cutting as it has no means of absorbing water just yet. Now the painful bit... WAIT. Rooting can take a long time, anywhere between 4-6 weeks, remembering to change the water every five days or so.
When to plant: So, it's been several weeks and hopefully by now you have some fresh root growth on your cutting. If you only have one or two singular roots with no side rooting, leave your cutting a little longer until these develop into a network like structure. If you have several roots a few inches long with side shoots, it is time to make the transition into soil. This process is a delicate stage and things can go wrong if it's not done correctly.
Transplanting into soil: When planting your cutting, the soil should be moisture retaining yet well-draining, containing a mixture of pearlite, vermiculite, sand and peat moss. Don’t use garden soil or compost here as it can contain pests and diseases that will be harmful to young plants. Line the base of a small 12cm grow pot with your potting mix, and then sit your cutting and roots on this. Slowly fill in and around the roots with potting mix, patting down gently once the pot it full. Now water the plant and allow the water in it to drain through. Place it back in a bright position and leave for another 4 weeks to establish, watering regularly to keep the soil moist.
Enjoy: The most important step as a new plant parent! Admire your new plants in all their glory.
BECOME A HORTOLOGIST
SIGN UP FOR INSPO & OFFERS IN YOUR INBOX


